Back in the day I made my living reshaping the skin of what we now call “classic cars”. I’m talk’n late ’70s Camaro and ’69 VW Karmann Ghia kinda stuff. Through my artistry, I was able to reclaim what rust and decay had stolen. But sadly some vehicles were too far gone to be safe on the road and were hauled off to the old auto bone yard. It’s too bad some of the bone yard rust buckets did not get a new lease on life via wall art or signage. That’s just what inavan is showing folk how to do. So if you fancy fabbing up your own vehicle wall art then explore with me inavan’s step by step photo process.
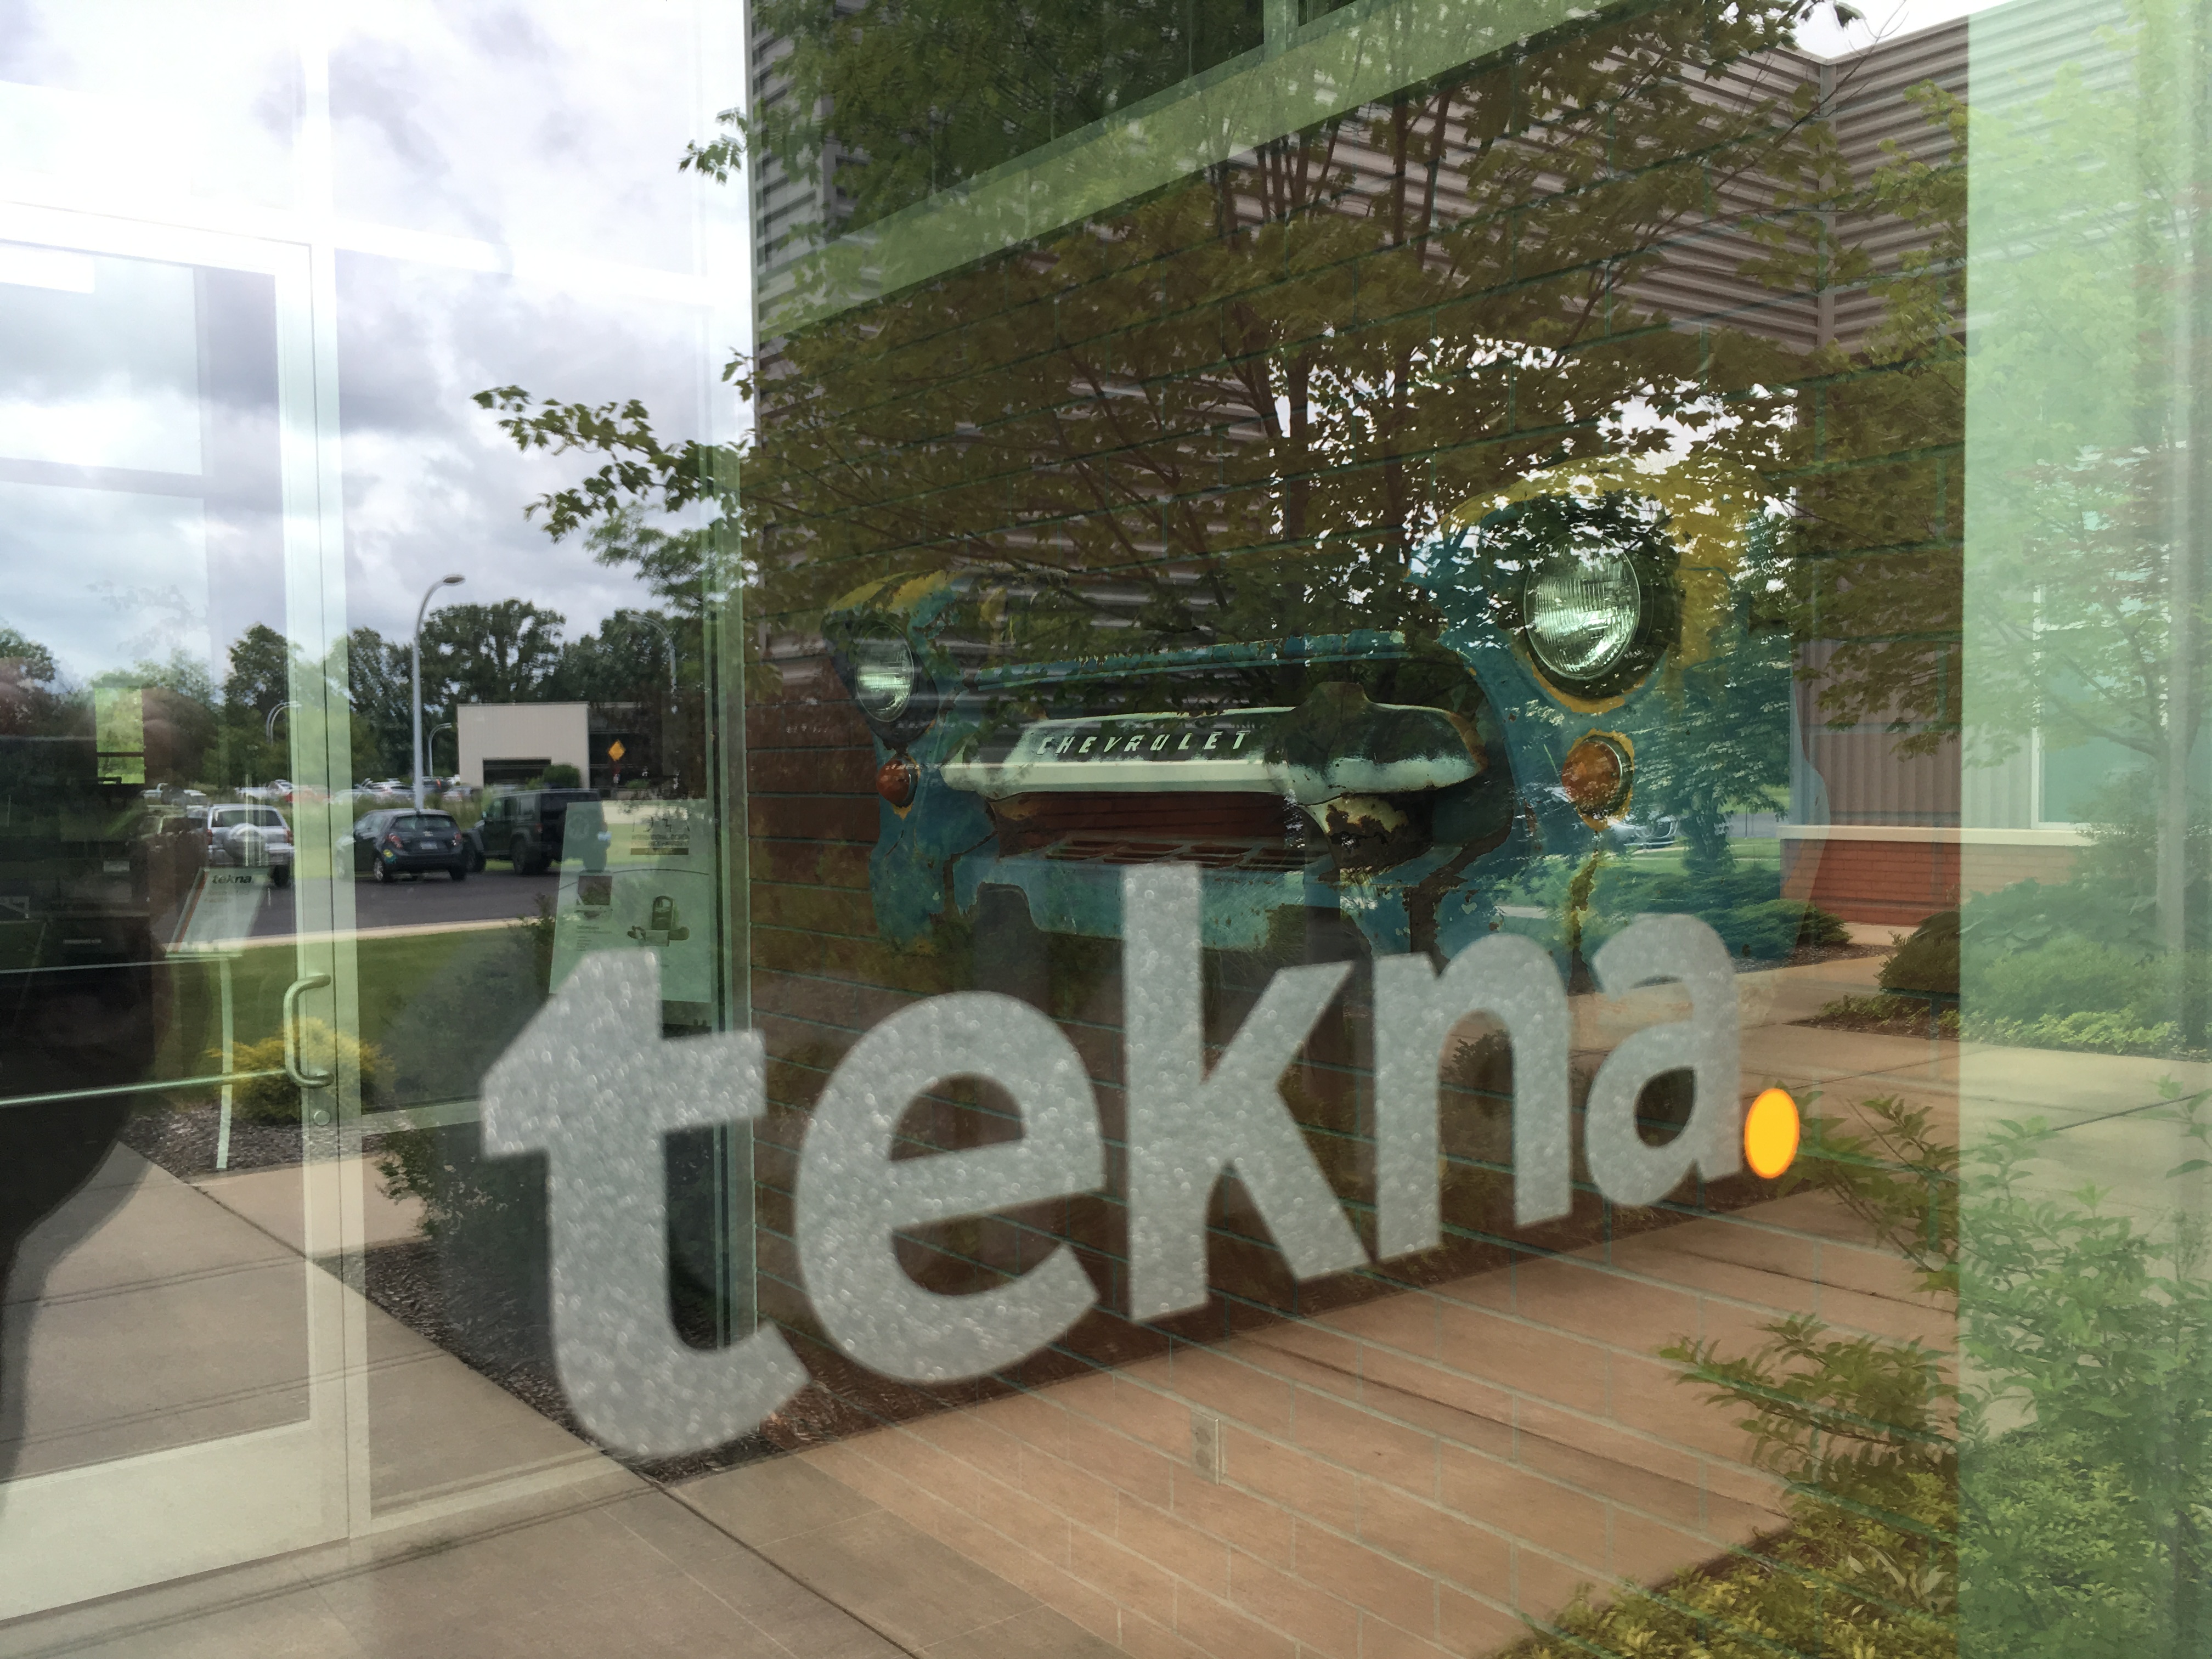
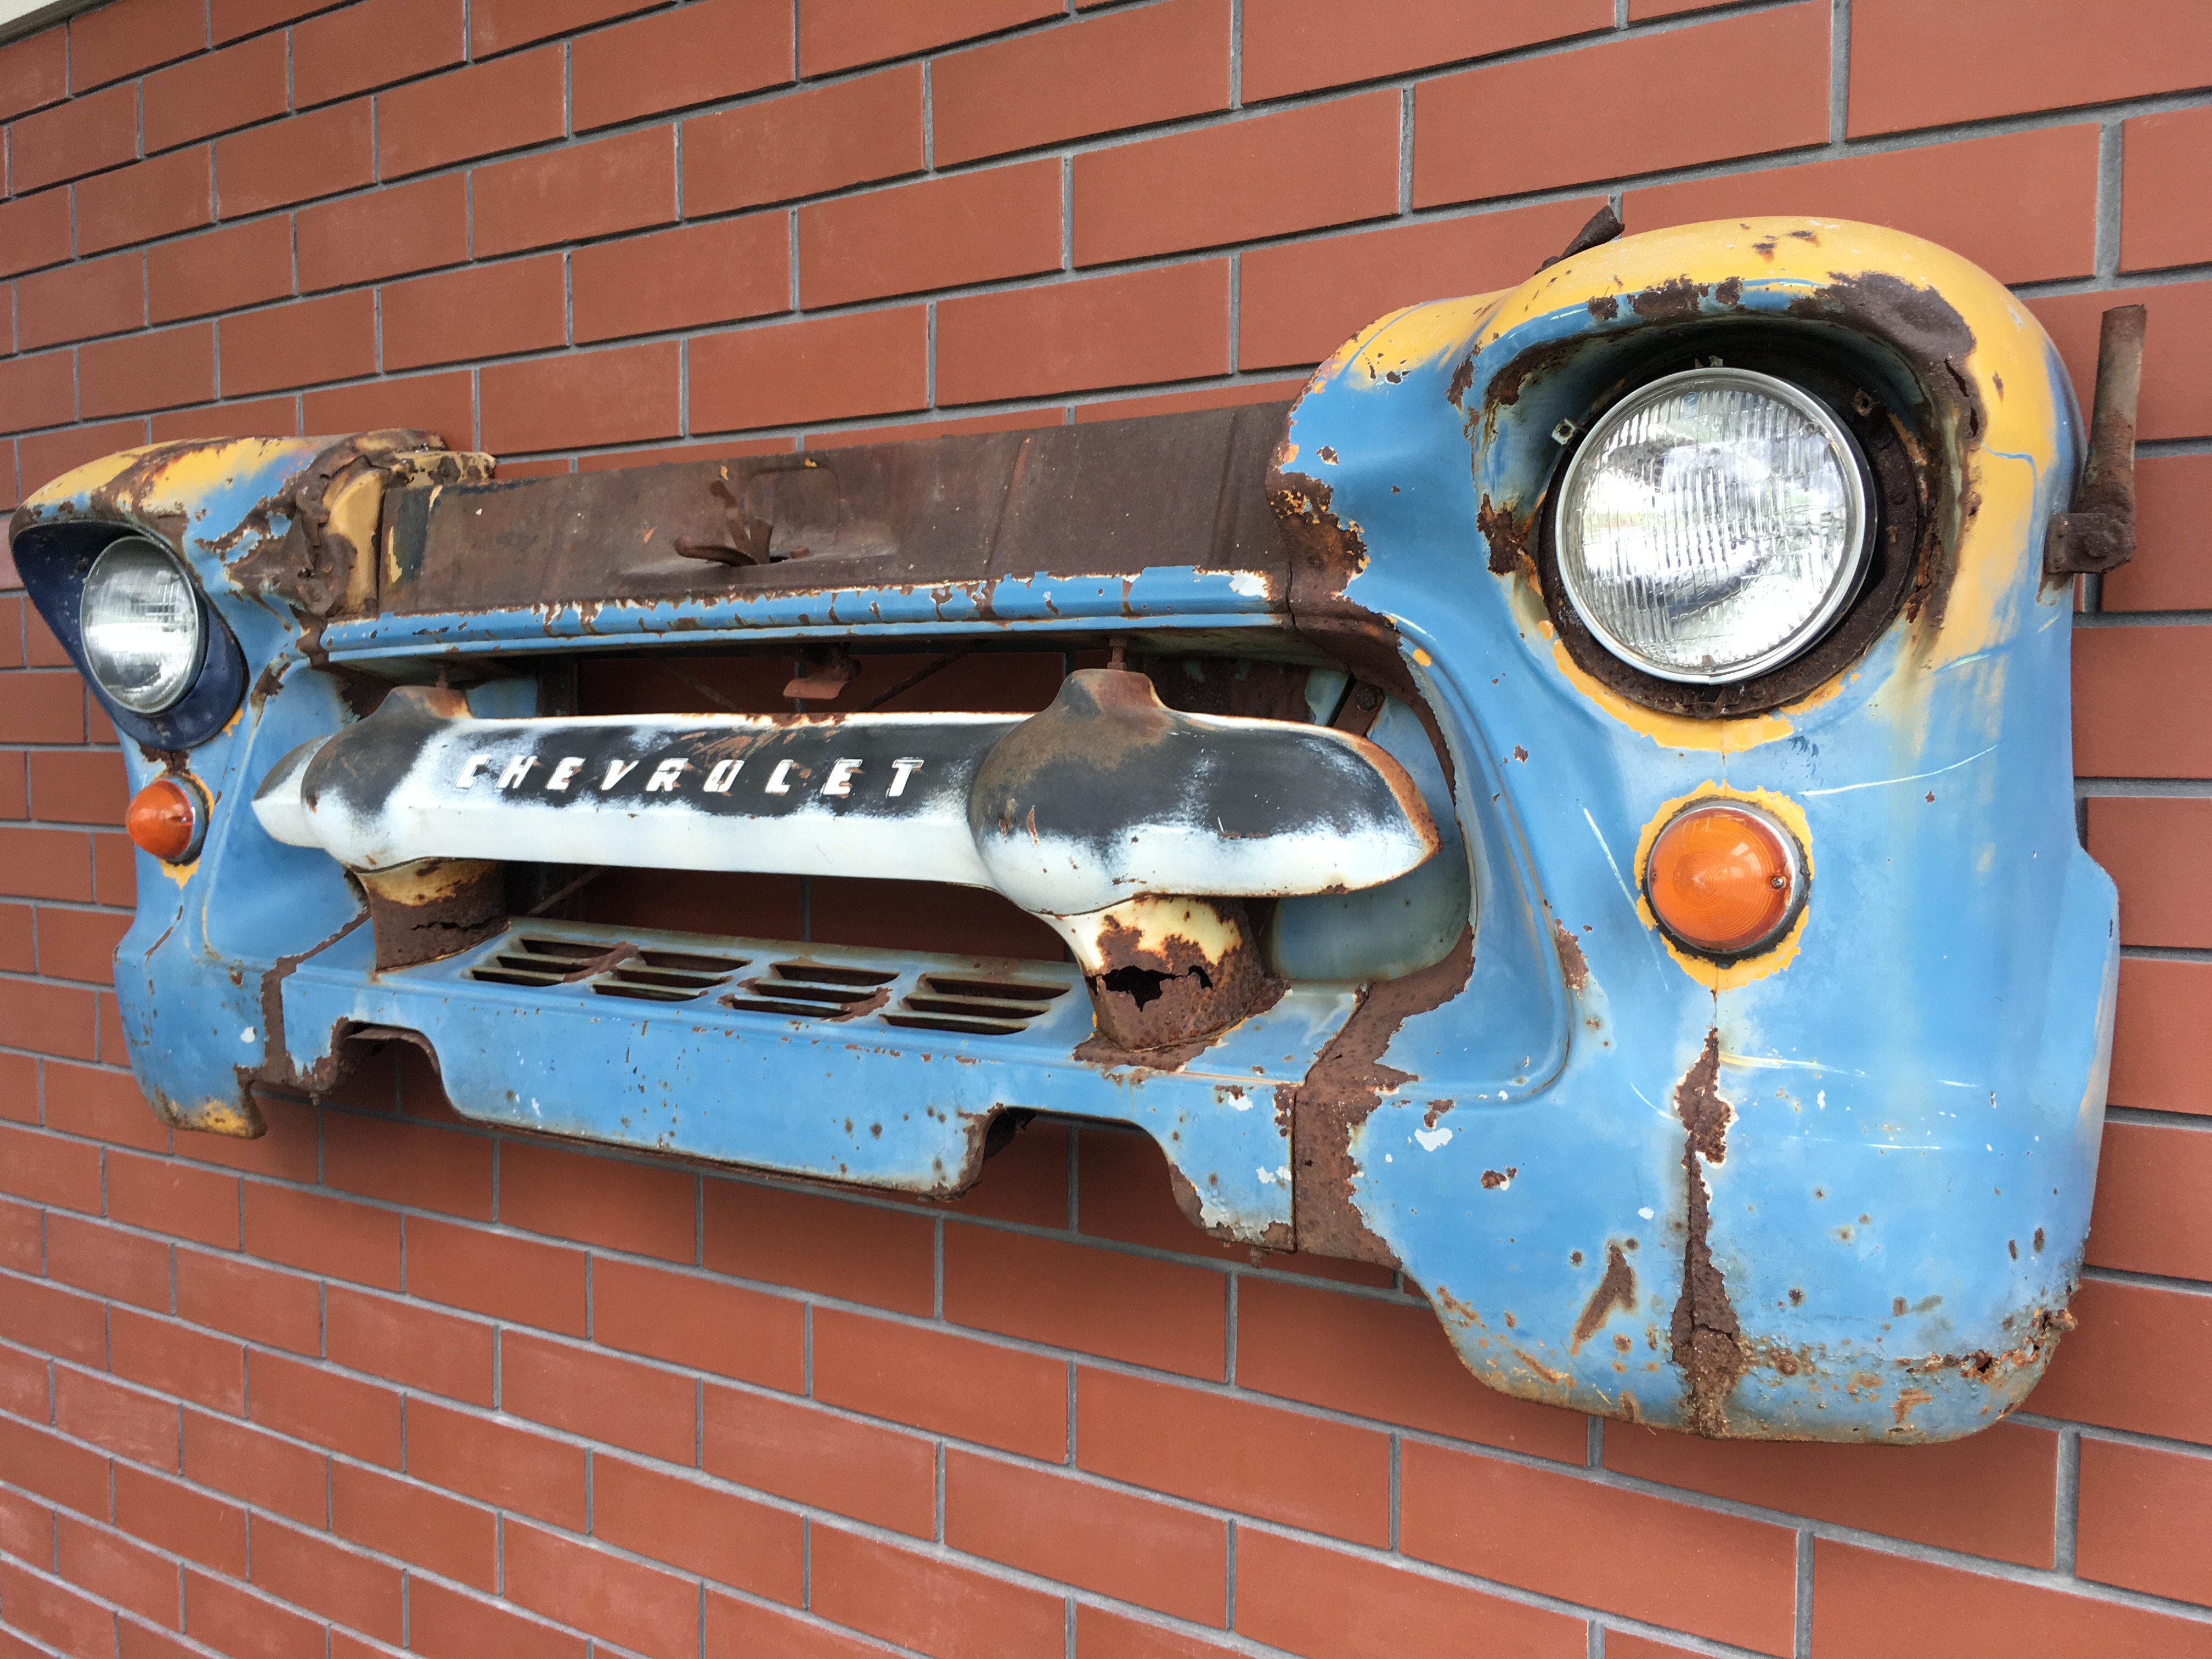
Prepping for this post I was reminded of a cool example of vehicle wall art. Perched in the entryway at Tekna Inc. the industrial design firm I worked at in Southwest Michigan is a classic Chevy nose clip. That art piece, along with the full-size airplane hanging from the ceiling in our design studio are just a sampling of the many visuals that fueled my creative engine!

I snapped these pics last week while back home in the States. Check out the GTO, now that’s a nose job. Judging by how clean that clip was I’d say those guys know their stuff. Examples of vehicles as art are all around, so keep on the lookout and be inspired to tackle your own project! So how does one go about making wall art from a full-size vehicle? Let’s have a look at inavan’s 1983 MK1 VW Rabbit wall art conversion process.

Inavan’s core business is dismantling VW’s of all types and salvaging the parts for resale. At the moment it looks like the wall art is a side hobby. The 1983 MK1 Caddy pickup project we’re told took approximately 40 hours to fabricate.
The Process
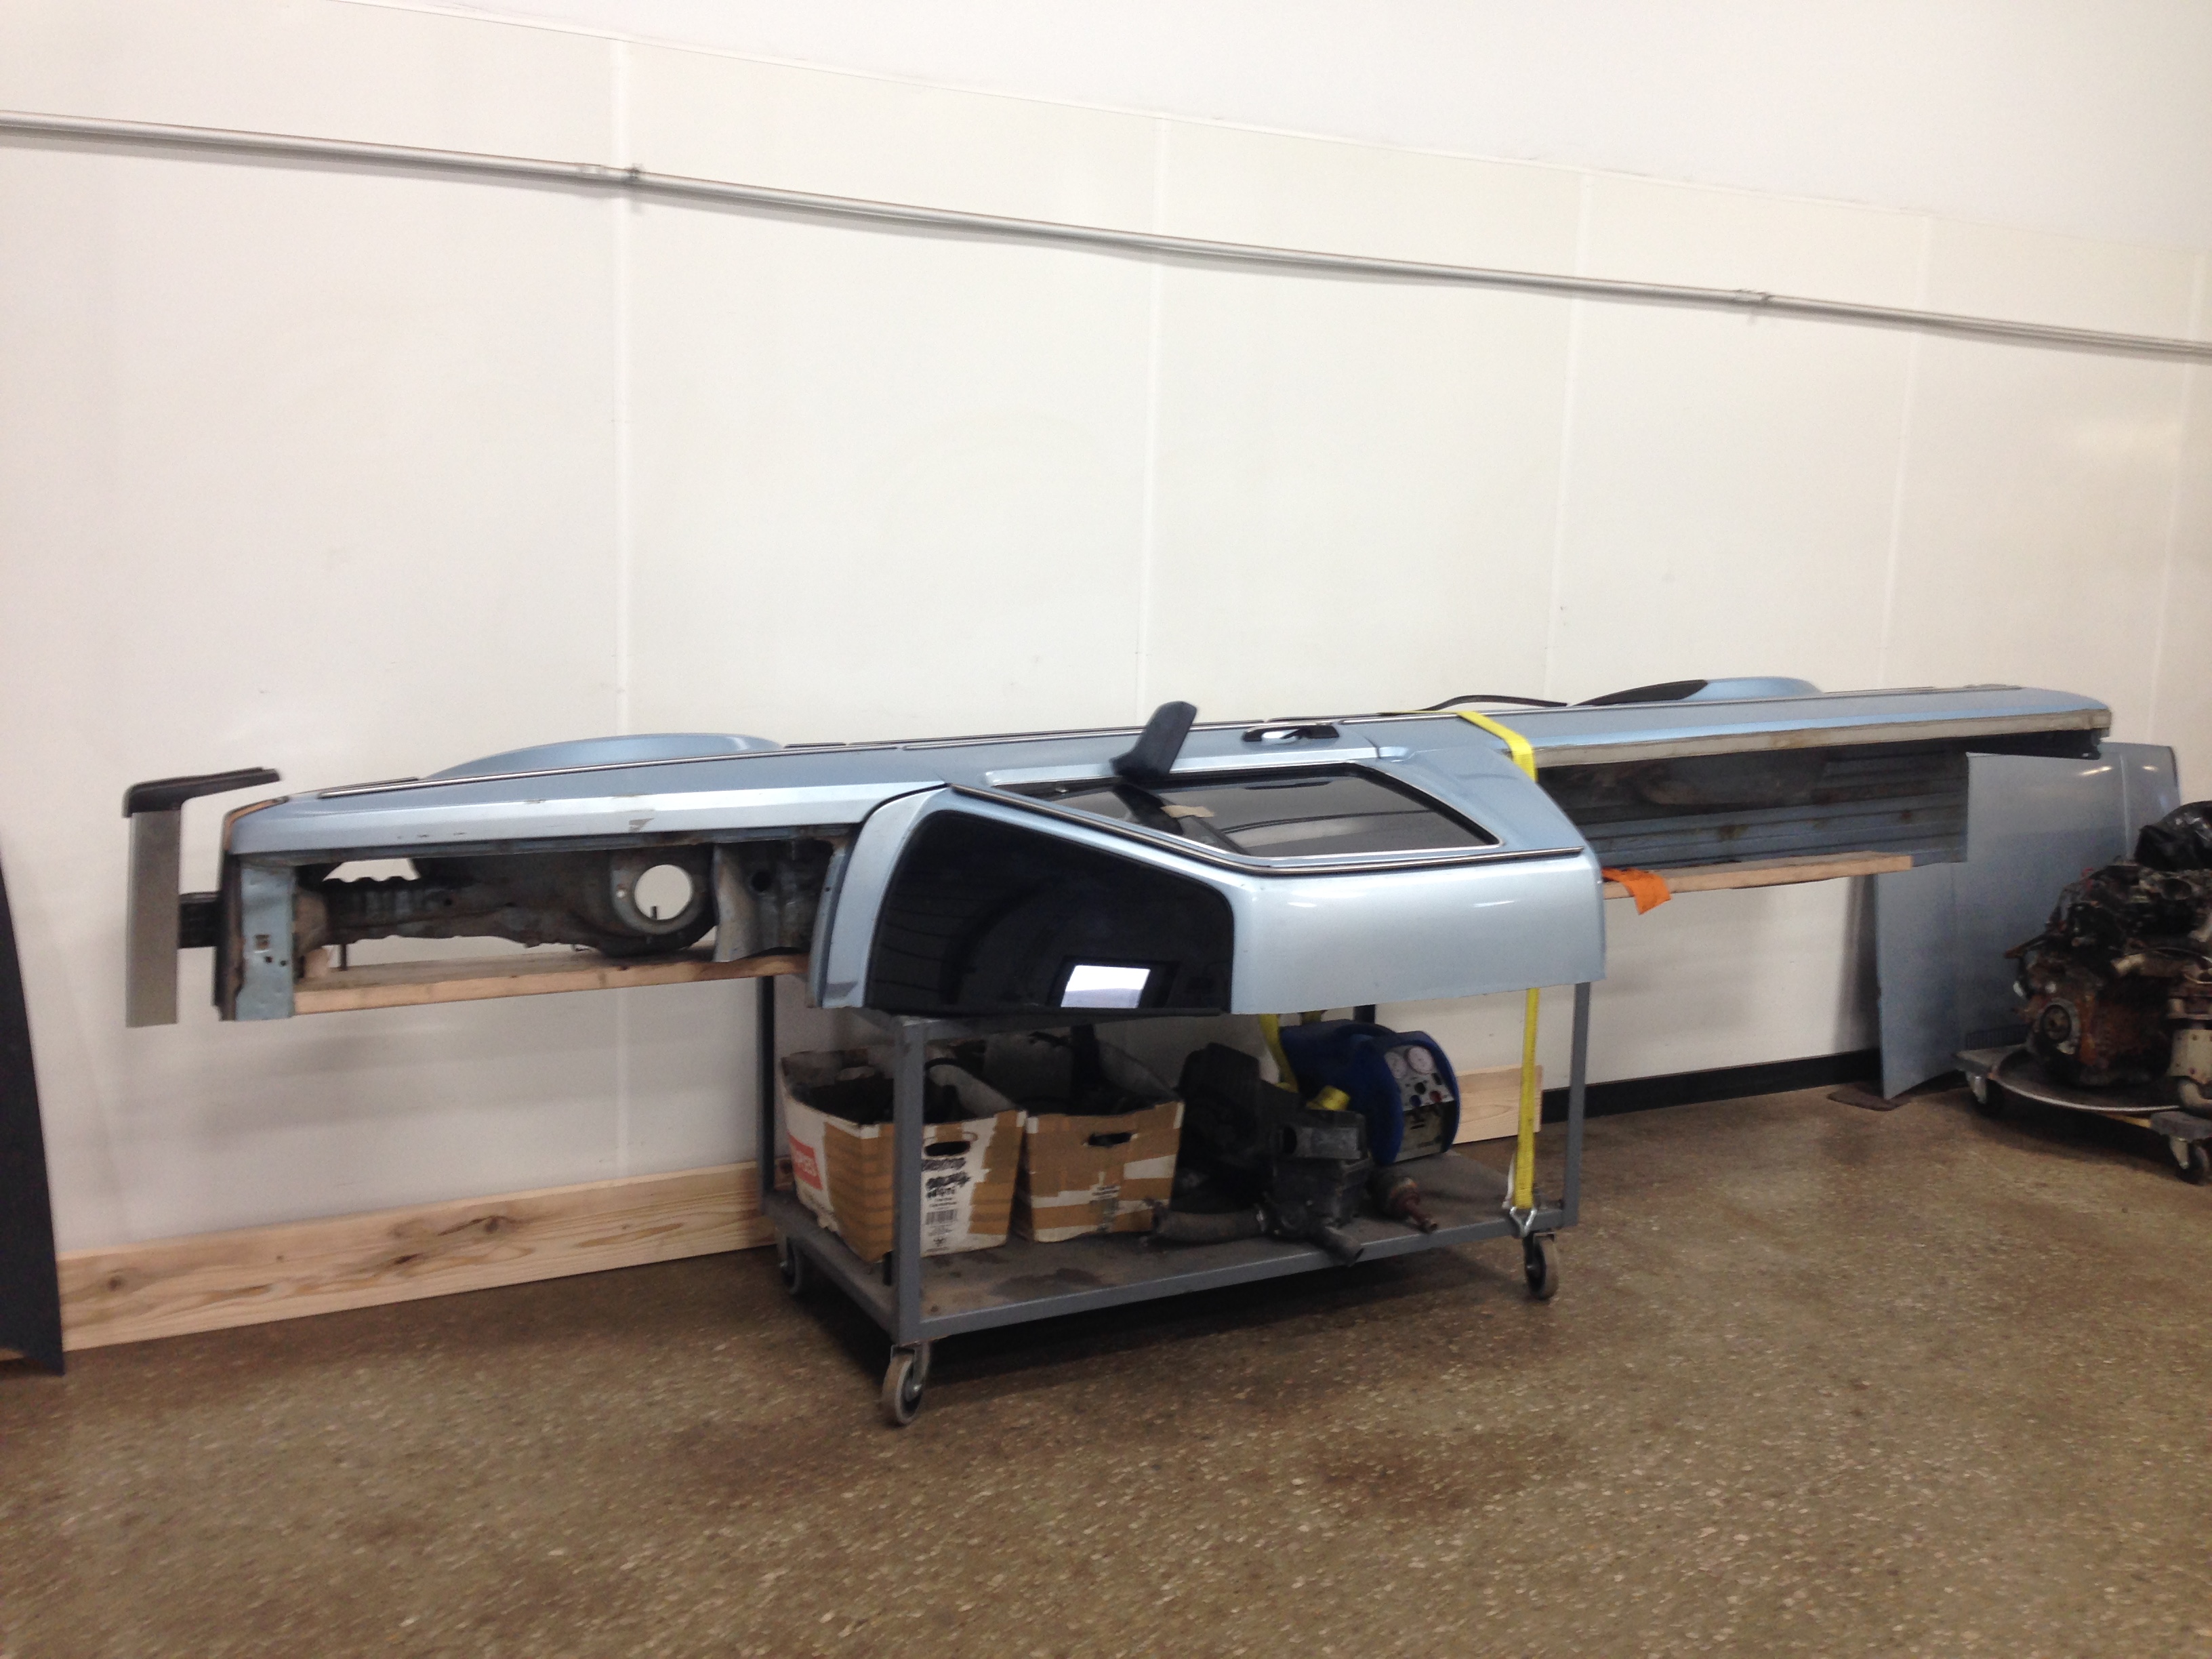
1. Choose a Configuration. The MK1 lent itself to a Longitudinal Section. Note the cut was not down the midplane but just inboard the side of the vehicle enough to capture the complete headlight and taillight assemblies. If there had been major crash damage to any region then perhaps a noise or tail clip wall hanging would have been the way to go.
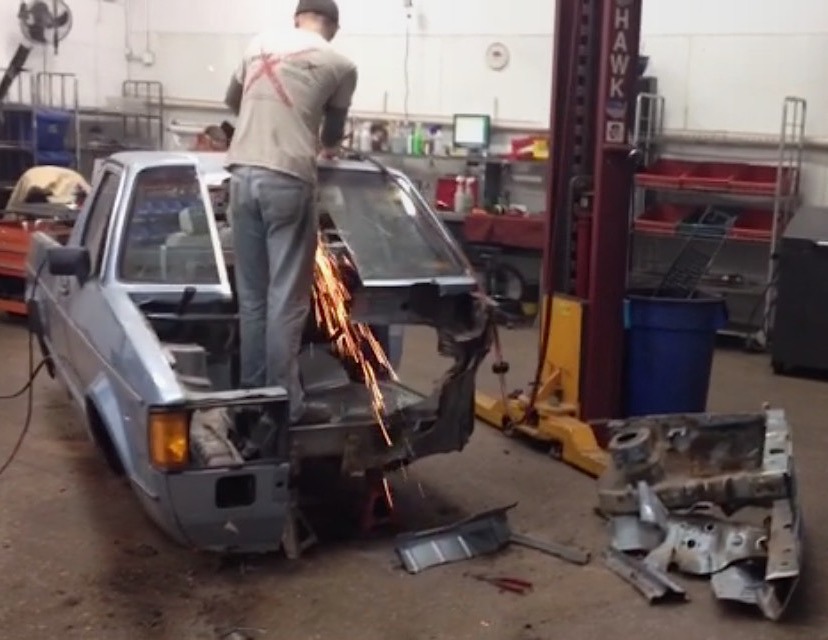
2. Size up the task and get ready to gut the vehicle – A full-size car can be a challenge to maneuver during the conversion process! So, unless you have several strapping cornfed fellas on call, you’ll be needing an assortment of dollies, jacks, and lifts. This type of project requires a total gut job. Work from the inside out removing the complete interior. Afterward move on to the outside. Pull the engine and tranny. Then strip off all the running gear.


3. Perform the Surgery – A reciprocating saw was used for most of the cutting. Given the sparks, it looks like an angle grinder was used for detailing some of the rough edges. Also judging from the pic the front radiator support, strut tower, and firewall were cut away in multiple pieces allowing for better access while sectioning the roof. It’s not clear which tool inavan used to cut the glass but the net result was that it got cracked in multiple places. If you want to be sure to successfully trim the windshield you better factor in a few more hours. Hagan Auto posted a video on cutting down a windshield that may be a better alternative.

4. Recycle the leftovers – Every single usable part was salvaged from this truck. The leftover shell albeit in pieces, was carted off to the local metal recycling center where a few pennies were recouped.


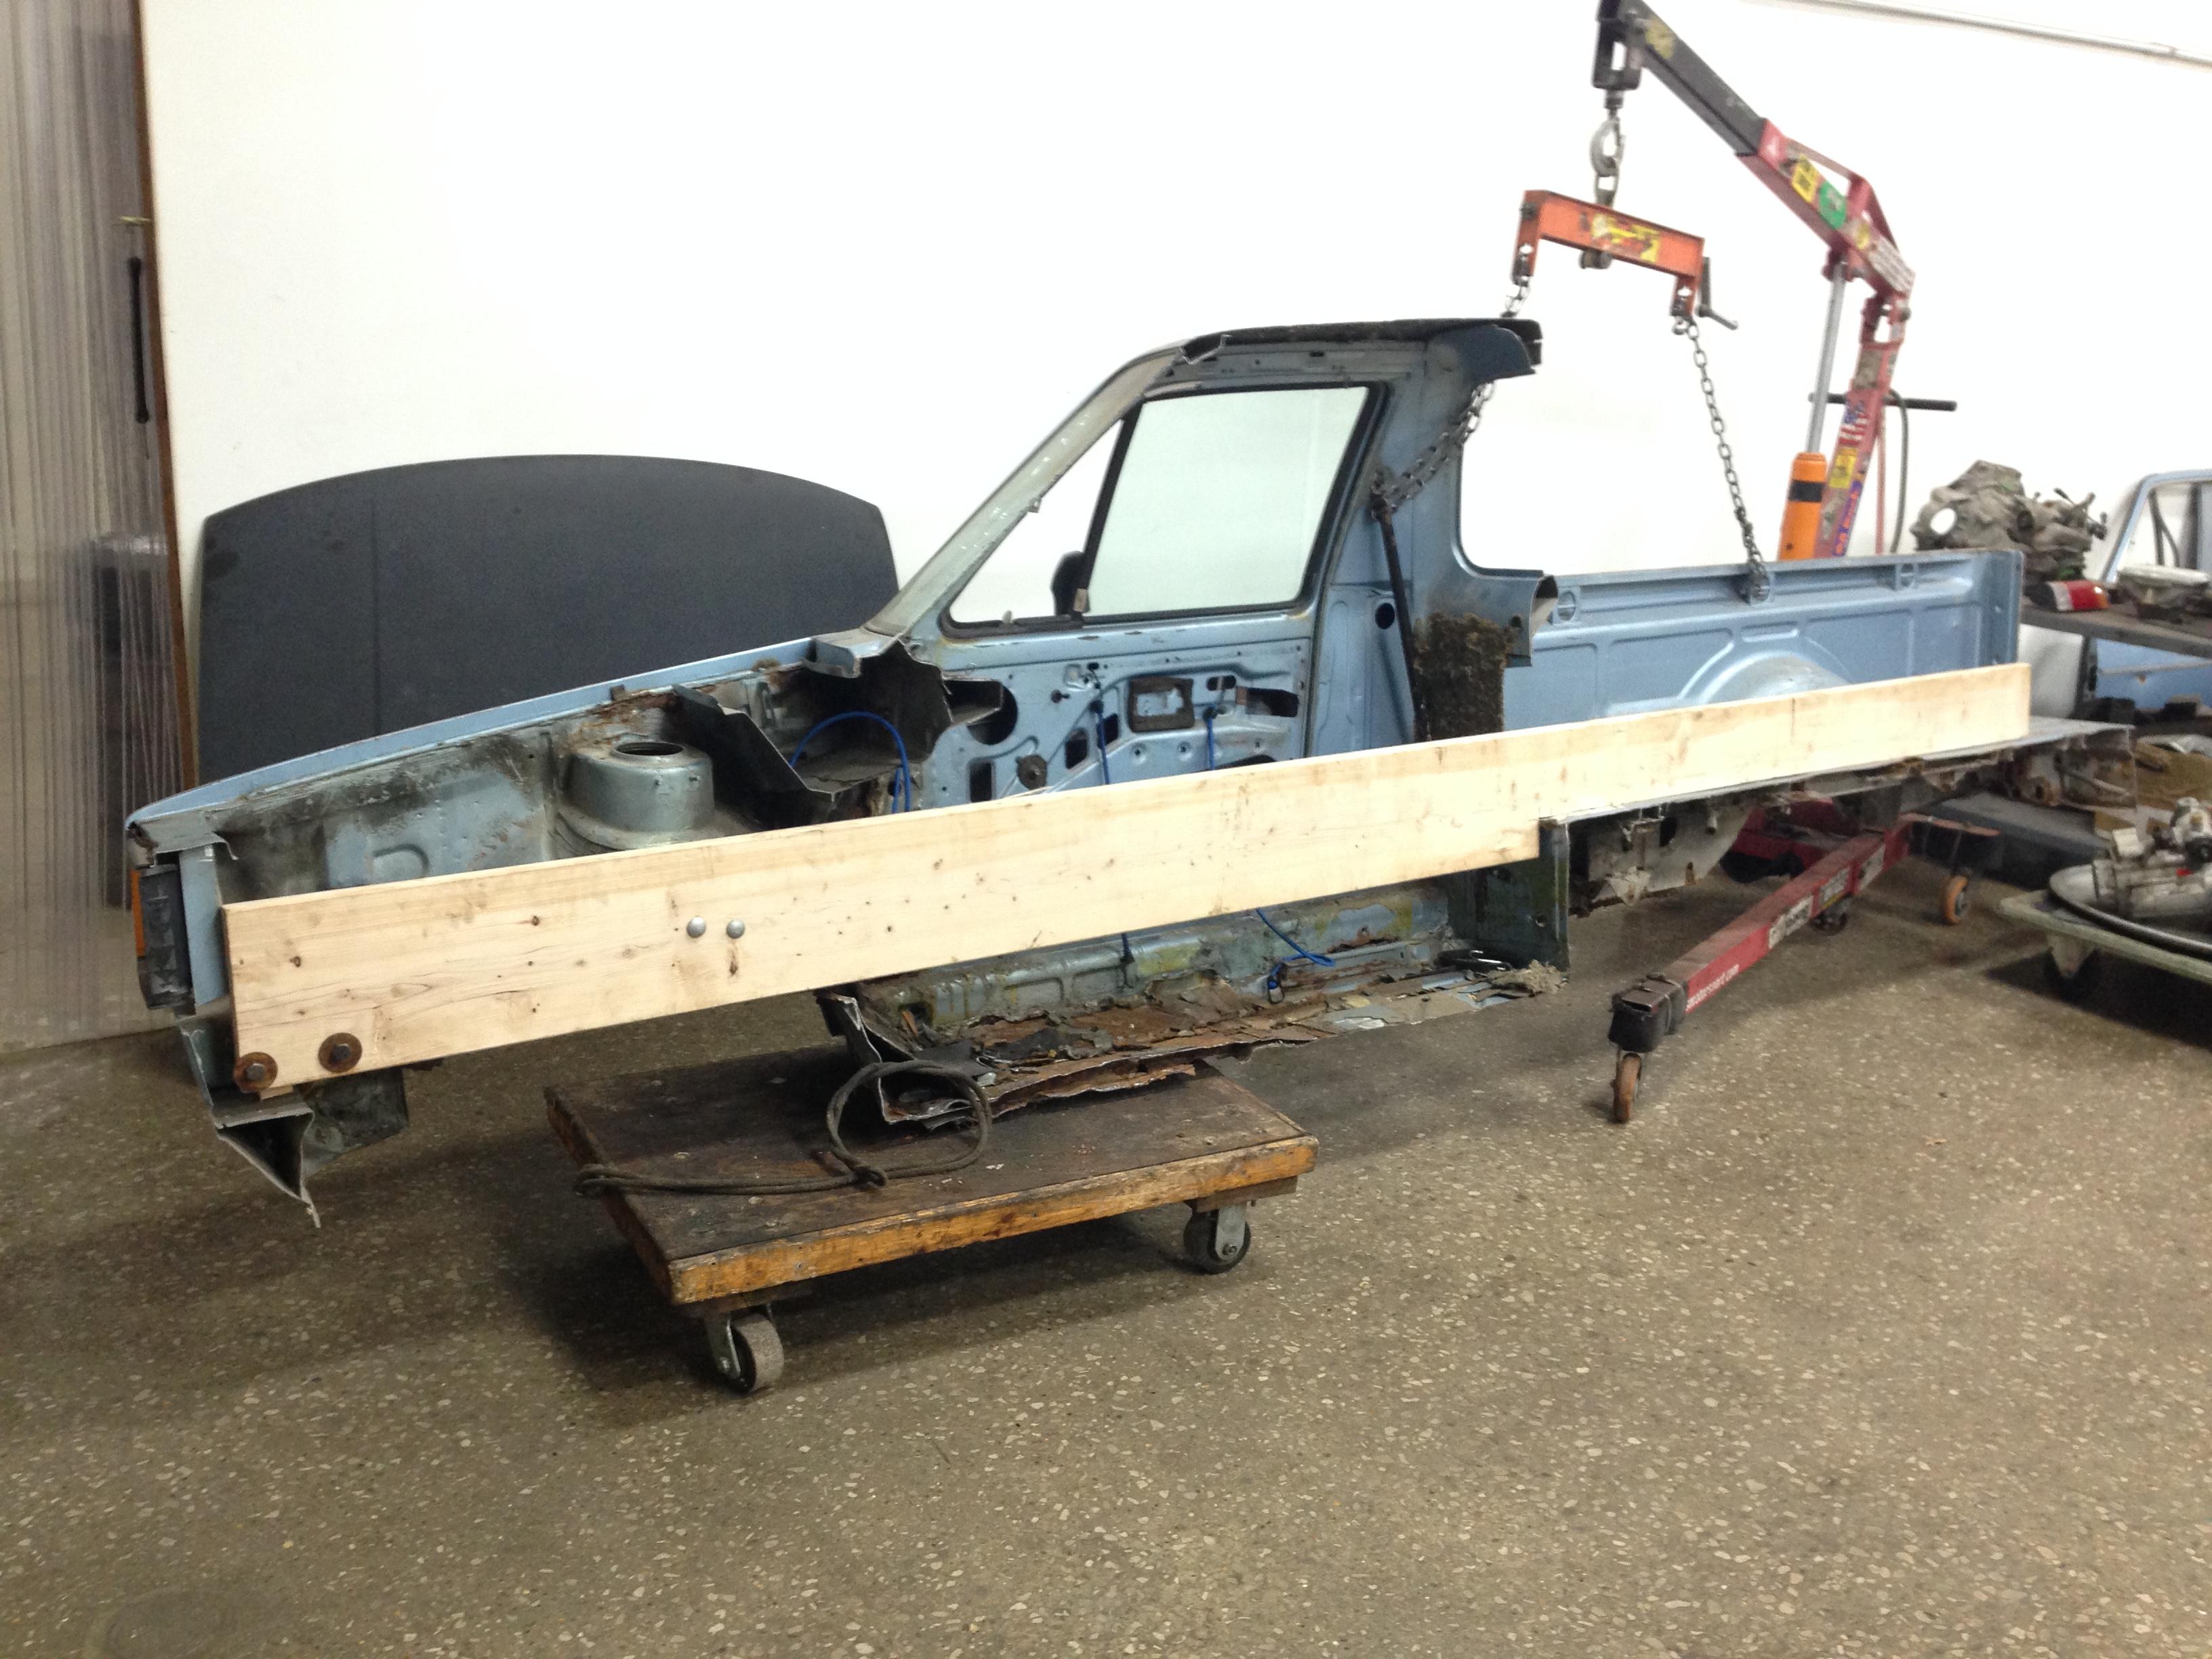
5. Build Wall Mounting Structure – A 2 x 10 board was selected as the main structural member to mount the Mk1 panels onto. A combination of through bolts and lag bolts held things together nicely.

6. Body Panel Detailing – Given the underside of the vehicle would be highly visible when hung on the wall, something had to be done about the extensive rust. The solution was to patch all holes with fiberglass. Afterward 3M brand black rubberized undercoat was used to seal in the underbody and provide a fresh look. No paint work was done, but instead all panels were machine polished to bring out the remaining luster of the original paint. Trailer spare tire mounts from Harbor Freight were fixed to the structure. After a little cleaning up the wheels were mounted in place.

Something needed to be done to mask the cracked windshield from the earlier step so it was decided to paint the back side black to give a tinted look. The side and back windows received the same treatment. Since the back glass was tempered and could not be cut, plexiglass was used to fill in the back opening. To prevent marring interior wall pinch-welt also known as U-Channel, was slid over all raw sheet metal edges that would come in contact with the wall once the finish piece was mounted.
7. Lighting – To make the wall art come alive USB LED lights were installed in the front and rear housings. Each light was powered by a phone chargers.


8. Hanging the Masterpiece – Mounting proved to be more of a challenge than expected as there was limited ceiling clearance. The top of the forklift mast had to be removed. Moral of the story, plan well for the installation!


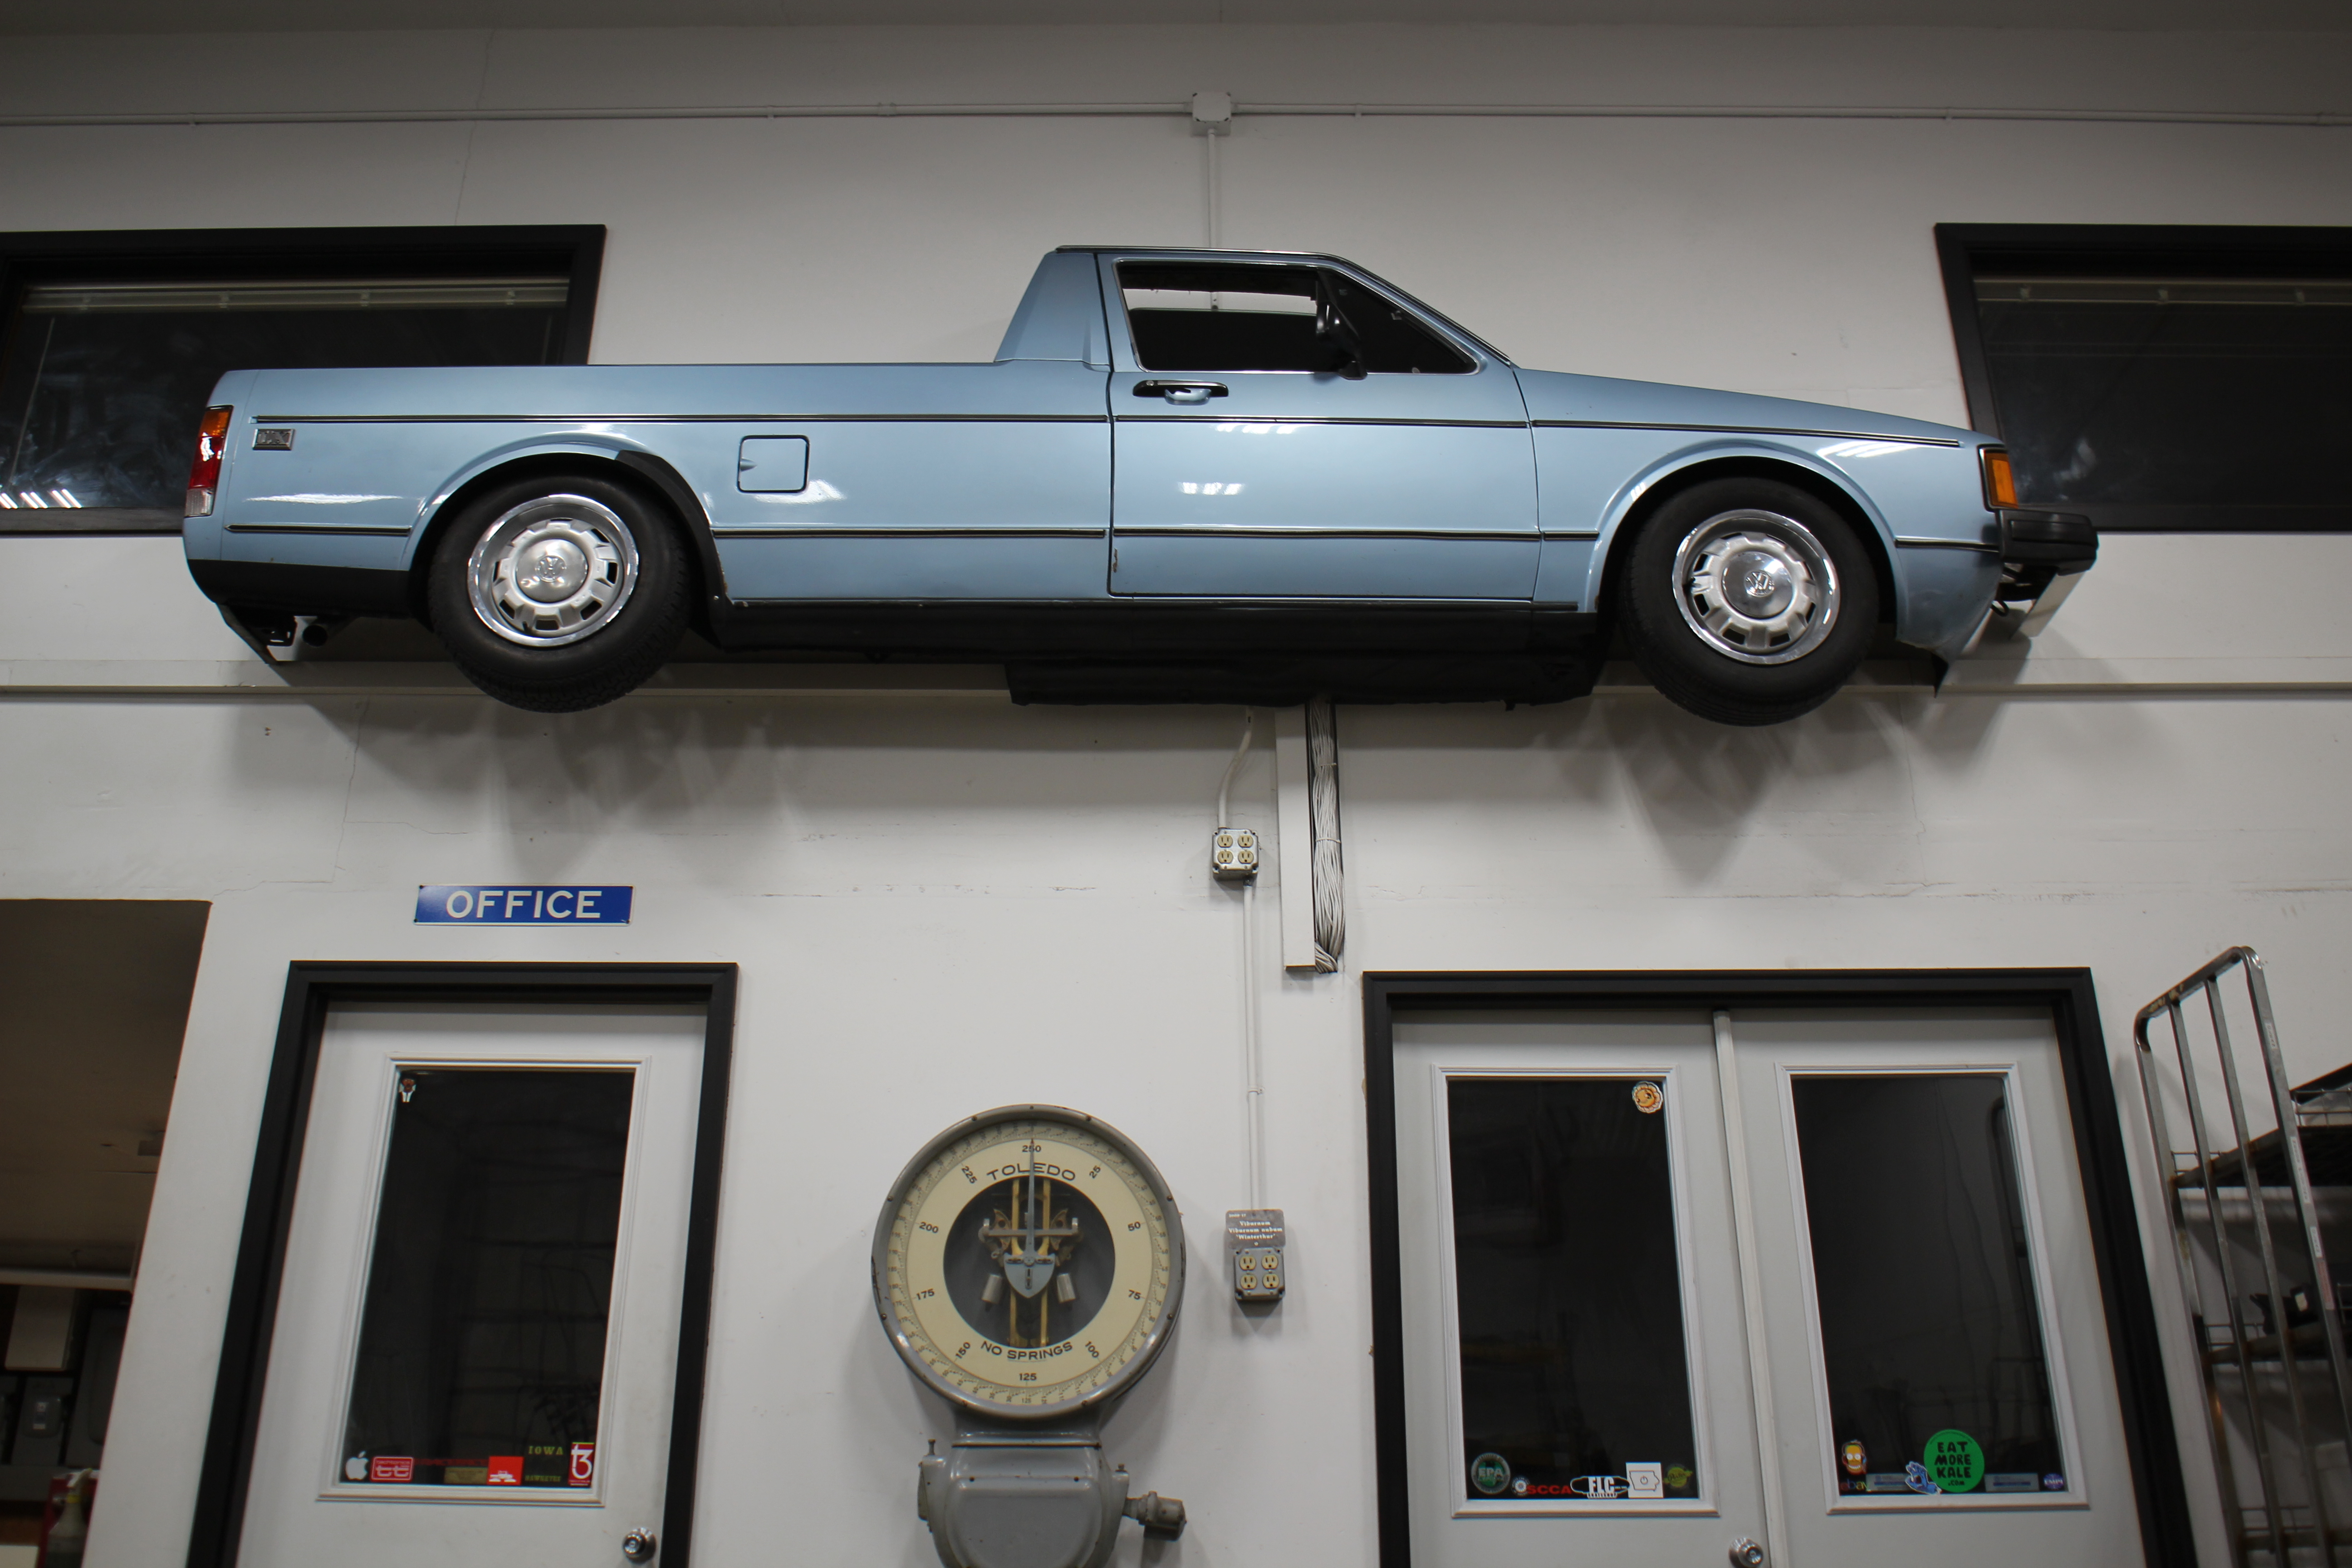

All in all, inavan’s vehicle wall art turned out pretty sweet! Have you ever done a project last this? Which car would you pick?


