
I needed to build a very quiet, high-capacity compressor for making ID models and prototypes in my shop. The one I have is quite loud and doesn’t have the capacity I was comfortable with for urethane casting work. I sourced a 6-gallon air tank on eBay for $35, including shipping, from a fellow in Indiana. Next, I needed a refrigerator compressor.
Why use a refrigerator compressor? Three reasons 1) You can get 100-300 watts from a typical compressor unit 2) they can deliver 0.7 – 1 CFM of air with pressures over 500 PSI and 3) they’re small and don’t take up very much space.
I got lucky and have a buddy I play hockey with who is in the small appliance repair business. He was able to provide a new replacement compressor unit that wasn’t needed on a job. He was also able to provide some of the copper tubing I needed for the project. Everything else was pretty straightforward after that. Oh, and it certainly helps to have access to a lot of good fabrication equipment. Here’s how it came together.
In the video I show you step by step how to build the compressor from parts you can buy on Ebay and your local hardware store, a scrap yard or source from an old fridge (with optional Motörhead badge too).
Attach the Compressor to the Air Tank
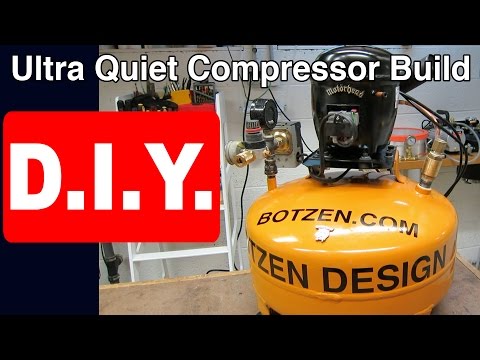
First, I built an adapter plate to mate the tank to the compressor motor. I built this from an old “Big Iron” IBM server cover. I made a cardboard template to follow and then transferred it to the sheet metal and folded the edges for extra strength. Then I applied a bit of primer and paint to finish the exposed metal.
Connect the Copper Tubing
Next, I mounted the motor on the bracket and connected the compressor side to the tank with some copper tubing and a one-way check valve to keep the air from flowing out of the tank back through the compressor inlet.
Add Shut Off Valve You Still Have from College
On the business side of the compressor I used some parts I had laying around including a pressure shut off valve I had from when I attended Pratt in the late 80’s, used for a dorm room airbrush set up. It still worked great and was able to turn the motor on an off with no issues.
Make it Super Quiet
The key to making the whole thing ultra quiet is building a intake manifold that absorbs the sound of the compressor. For this I used a spent metal aerosol travel shaving cream can. It already had openings at both ends and was perfect for my needs. I packed it with some brass wool to help absorb the sound and added some open cell foam for a filter. The combination of the metal can and the brass wool significantly mutes the sound and makes the whole set up extremely quite.
Add Proper Metal Band Graphics
Last but not least, I added some Motörhead badges to give it some character (R.I.P Lemmy). A fun build and an essential piece of shop equipment to have when making Industrial Design models and prototypes.


