
In Part I we went through the steps of creating a silicone mold. Now we are ready to cast the actual part. Are your ready for this?
Ok, so when you’re casting prototype plastic parts you have a huge selection of materials to choose from these days. The selection of resins alone is truly astounding. You can cast parts using various materials, including Polyurethanes, Epoxies, cheap Polyesters, or even Silicones. We are going to use Urethane resin for this project. Let’s break down what you’ll need.
First, let’s have a look and walk through the process.
MATERIALS
How to Cast Resin Using a Two-Part Silicon Mold
- Urethane resin (IE-3076)
- Mixing stick
- Mixing Cup
- Wax paper or Aluminum Foil
- Rubber Band
Tools:
- 60cc Syringe with tip
- 3 Gallon vacuum tank (mandatory, for degassing)
- Pressure tank (optional heat for thin part curing)
- Black Latex exam gloves
- Nippers for part clean up
- Digital scale
- Timer
- Silicone mold (from Part I!)
STEPS
Step 1: Select the correct resin for your application
For this casting project I used a IE3076 Polyurethane resin from Innovative Polymers This type of resin is often just referred to as Urethane resin. It comes in various hardnesses as well. Check with your manufacturer what is the right material for your application. I like using the 3076 as it is a great all around resin because of it long pot life of about 1215 minutes, and excellent strength and ability to simulate an injection molded ABS part. The pot life refers to the time it takes the material to gel before you can not pour or successfully use it anymore.
Step 2: Set up and Mixing
Once you’ve selected the correct resin it’s time to start casting or injection molding your parts into the silicone mold. See Part I here for information about making the two-part silicone mold. I will be casting a custom Joby hotshoe SR71 Unity camera mount I designed.

Resins are mixed two ways. By weight or by volume. I will be using the weight method as shown in the video. I am using a digital kitchen scale set to grams, which makes it really easy for me to mix by weight. I’m also using translucent, disposable, grocery store plastic cups to mix everything. I tare the scale to Zero with the plastic cup and add the first component of the two part mixture. I usually start with the thicker of the two components–in this case the resin. Once I have the amount of resin I need for the job, I can add a colorant if needed or tare it so I can add the hardener.

I get my digital kitchen timer ready at this point, because it’s a really good idea to keep track of the mix time, particularly when using a vacuum tank to degas your material. I make sure to tare the scale and start the timer, then I add the hardener. You will notice I use a blue mixing stick and not a wooden tongue depressor to mix the two components. I cast these sticks myself from leftover resin. The reason I use a plastic mixing stick is to keep moisture out of the mix. Urethane is susceptible to moisture and wooden mixing stick can release moisture into your resin. I am trying to avoid air bubbles in my part so keeping the moisture to a minimum is important. I also have the mold ready to go ahead of time, clamped together with some hard board and a rubber band.

Step 3: Degas in a vacuum tank
After about two minutes of thorough, vigorous mixing and scraping the sides of the plastic cup, it’s time to put the mixture into the vacuum tank for degassing. This is essential for making perfect bubble-free parts. The purpose of a vacuum tank is to remove air from inside the chamber. I place my mixed cup of resin in the tank and begin to remove the trapped air in the urethane. You can see the resin ‘cocktail bubbles’–this is the air being removed from the resin. Once the air bubbles stop forming at the top of the mixture, you know that you have removed all the trapped air and you can remove it from the tank and begin to inject it into your silicone mold.

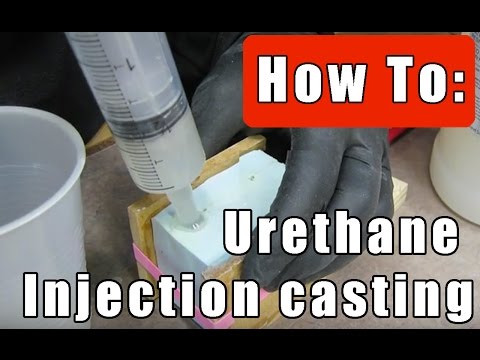
Step 4: Inject the Resin or pour into the mold
I like to injection cast my parts. It allows me to quickly get thick material into a complex mold very easily. I simply suck the resin into a syringe and slowly inject it into my mold. This method allows me to use virtually any thick material. The 3076 resin is quite thin so it’s not too difficult to inject, but for thicker urethanes and silicones, or materials that do not have a long pot life, it’s an indispensable method.

Step 5: Place under pressure in a pressure tank (optional)
Since I am trying to make a strong bubble-free part, I place the silicone mold with the resin into my heated pressure tank. The pressure in the tank squeezes any remaining air bubbles (if there are any visible ones) down to a microscopic level. This heat in the tank also has the effect of speeding up the cure time of the resin. This will also speed up your demold times and can be beneficial if you need to create several parts in a short amount of time.

Step 6: Demold
We’re almost there. After a few hours in the heated pressure pot, the resin has set and is ready to be removed from the tank and the silicone mold. It’s time to demold our part and see if we have a successful cast.
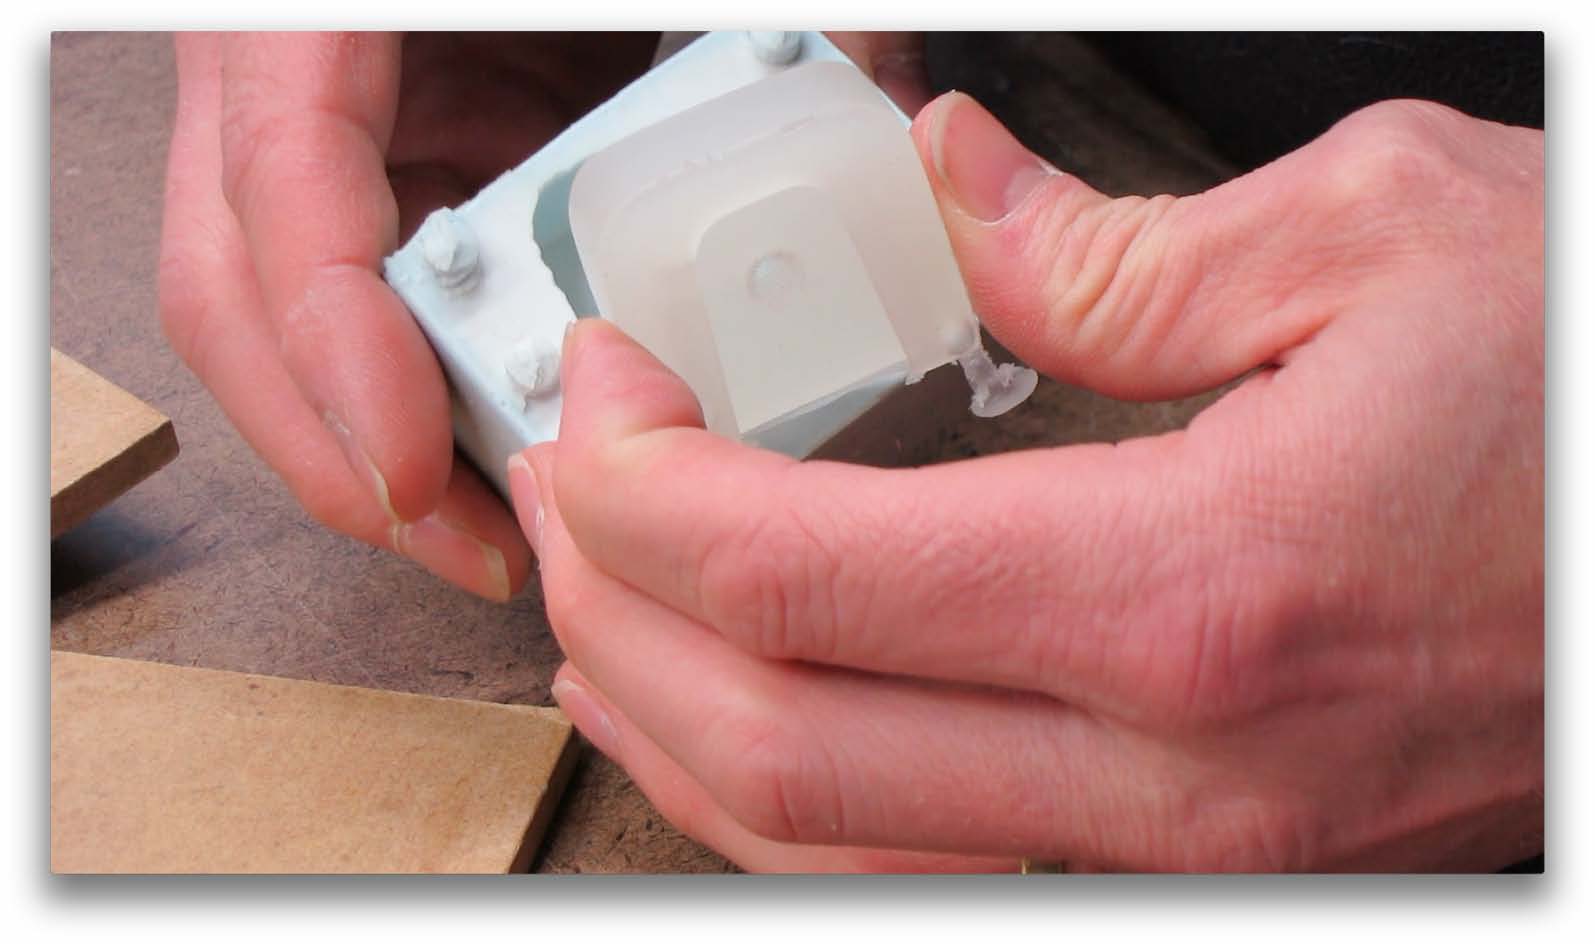
Just be gentle when you are removing your parts from your silicone mold. If you are careful and treat them nice you can get 50 parts, no problem. This mold has undercuts and threads, and I have cast dozens of parts so far with the molds holding up quite well. Depending on how your mold come out, you may have a bit of clean up; some flash to trim off. In my case, there was no flash to worry about, so just be aware that your mileage may vary.

If you are interested, you can purchase the SR71 Unity Joby Hotshoe adapter mounts here.
You can also read the full expanded and detailed Instructable here.
You can purchase the actual threaded hotshoe mount here.


