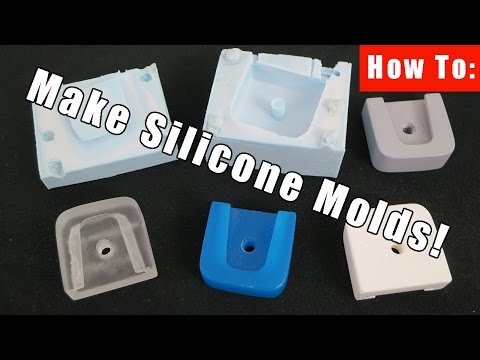
When you work with an Industrial Designer (or as one) and you’re developing a physical product you want to bring to market, at some point you will probably have to make a functional model or a working prototype. There are many levels of possible mock-ups. Usually, in the later design phases or pre-production stages, you will need to make multiples of a product for field testing. In this case you will often want to simulate your part as a production part using materials that emulate the final injection molded product. Urethane is ideal in this case and a simple two-part silicon mold will get you there.
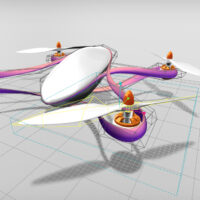
In this tutorial I cast a custom Joby hotshoe mount I designed. This mount allows you to use the big Joby hot shoe for all kinds of stuff, like tripods and video dollies along with various wall mounts and quick releases systems. It uses the standard ¼-20 thread mount that most cameras use as well.
The beauty of this kind of a silicone mold is that it is economical, lasts a long time and has great flexibility. It also has other advantages such as quick setup and high precision. It’s my preferred method of casting an encapsulated part that does not have a flat side to pour into.
Once you have a master part that is ready for duplication, there is some setup that needs to take place so that you can make a good casting of your part. Let’s have a look and walk through the process.
MATERIALS
How to Make a Simple Two-Part Silicon Mold
- Master part you are casting
- Reusable mold box (plywood works well)
- Wood spacer (to attach master part to)
- Sulfer-free clay
- GI 1100 Silicone
- Silicone catalyst (comes with Silicone)
- Mixing cup
- Vasaline
- Naphtha (Paint thinner to use as release agent)
Tools:
- Drill & Drill bit (for hole alignment)
- Mixing stick
- Scissors/utility knife
- Latex rubber gloves
- Digital scale
- 3 Gallon vacuum tank (optional, for degassing)
STEPS
Step 1: Gather Materials/Parting Line Strategy
The basic strategy for casting a part like this is fairly straightforward. You just need a good plan for where you want to have your parting line for the two halves of the silicone mold. I like to put that parting line along the edges of the part and not on a flat surface. This gives me the nicest parts that are easy to clean up, if needed. My goal is always to have a perfect part that needs no post casting clean up work done to it. I also prefer to make a two part mold instead of cutting the silicone with a knife for the parting line. Below are the material laid out to get us underway.

Step 2: Prep the Master Part
Once you have your materials together and a strategy for the parting lines of your silicone, it’s time to add some sulfur-free clay to the part to block off areas that you don’t want to cast in the first half of your mold. You will also need to add a runner to pour or inject you resin into and some sprues to vent the excess resin with. The clay is also a good way to keep the part secure and and from floating away from your base in your mold box when you pour your silicone on the part.

Step 3: Cast the first half
When the part is ‘clayed-up’ and secure in the mold box it is time to pour the first half of the Silicone mold. Use a good quality Silicone. I like to use the Silicone from Innovative Polymers that they distribute from Silicones Inc. Mix it thoroughly and take the air out of it in a vacuum tank if you have access to one. The last thing you want is an air bubble trapped against your part after you did all the casting and have to start over. Now just let the silicone cure overnight so you can start casting the second half.


Step 4: Cast the second half
To cast the second half of the silicone mold you will need to open your mold box and keep the part in the silicone, but remove the clay so you can finish casting the rest of the part. You will need to keep the runner and sprues in place however. Flip the part over and rebuild your mold box around your part so you can pour the silicone in for the second half. VERY IMPORTANT: Use a release agent on the existing exposed silicone . If you don’t, you will not have a two part mold! You will have a solid block of silicone with a trapped part and defeat the purpose of making a two part silicone mold. At this point you are ready to mix your second batch of silicone, make sure you mix it well!


Let the silicone cure again overnight and demold. You should now be ready to cast some resin parts.
You can also read the full expanded and detailed Instructable here.
You can purchase the actual threaded hotshoe mount here.